July 26, 2019

How to Easily Replace / Install an Auger Motor in your Pellet Stove- Tutorial

If you have an older stove model and you notice the auger turning more slowly, very noisy and fewer pellets dropping, then you may want to install a new auger motor.
Find your replacement auger motor right here.
Click here to order a Replacement Auger Motor
 Some newer auger motor have updates such as ball bearing input shafts that last longer and needle bearings on the output shaft (the big shaft that connects to the auger) that are more rugged under heavy loads. These motors also have more magnets that provide greater torque (or force) to feed pellets properly and consistently at all heat levels. Greater torque also means less auger jams.

Auger Motor Hole in Shaft  Auger Motor No Hole

How to remove the old auger motor:

1. Remove either the back panel or side panel of the stove. It is usually the back panel. You may consult your owners manual to see which panel you'll need to remove. Check the exploded view or parts diagram that shows pictures of all the parts to see where the auger motor is located. Some stoves such as Englander stoves have two auger motors.

2. Next clean any rust surrounding the motor if there is any with a wire wheel. This will make it easier to remove the auger motor.

Clean Rust Auger Motor Remove Easily  Set Screw after wire wheeling

3. If your auger motor has a collar and set screw or bolt. Spray some PC Blaster on in the set screw or bolt to lubricate and make it easier to remove. Below is a picture of the lube I use.

Set Screw Lubrication

4. Unclip the AC wires from the electromagnet of the motor on the back of the gearbox. If they are stuck, you may use long nose pliers.


5. Use an AC test cord to power the auger motor and rotate the shaft so that the set screw or bolt on the auger collar can be accessed easily from inside the stove. You may simply plug the test cord on the male clips on the electromagnet on the back of the gearbox. The picture below depicts an Allen wrench in position to unscrew a set screw.

Auger Turn Collar Set Screw


6. Remove the motor using the appropriate tools. See the instructions below for removing set bolts and set screws or hitch pins.


a) If there is a collar on the auger shaft, you'll need to either use a socket set to remove the set bolts or an Allen wrench (Hex Key) to remove the set screws.

Socket Set Bolt  

The bolt or set screw goes through the collar into a hole in the auger shaft. Englander stoves use set bolts. There is a head that juts out where a socket is used.


Most other stoves use set screws and an Allen wrench is used to remove them. Remove the bolt or set screw, press against the flat portion of the motor shaft, then pull the motor out.


b) If there is a hitch pin, you may use long nose pliers to remove it. The straight leg of the hitch pin a goes through the holes in the auger shaft and auger motor shaft. You may have to tap the end of the straight leg of the hitch pin with a hammer and screw driver to get it started, then you may pull it straight out with the pliers.

  Hitch Pin

7. If the motor still seems stuck, carefully use a mini crowbar and a piece of wood. Tap it loose a bit at a time with just the right pressure.

Hammer Auger Motor Removal

Often the motor will come out without having to tap it out. I had one where the shaft broke off because of how jammed the auger was. In a couple of cases, the auger and the auger motor were stuck together. I had to separate them outside the stove. If the auger breaks then it must also be replaced.

Here's a picture of the auger motor now removed from the auger collar:

Auger Motor Removed from Pellet Stove

How to install the new auger motor:

1. Clip the AC wires onto the electromagnet of the motor on the back of the gearbox.

2. Once you clip the wires back on, use an AC cord to power the motor and rotate the flat side of the shaft of the new auger motor so that it is in the same position as the shaft of the old auger motor when it was removed from the stove.

Auger Motor Rotate Set Screw

3. a) If your auger motor attaches using an auger collar with a set bolt, use a socket to screw the bolt into the auger collar.
b) If your auger motor attaches using an auger collar with a set screw, use an Allen wrench to screw in the set screw.
c) If your auger motor attaches with a hitch pin, guide the straight leg of the hitch pin through into the holes in the auger and auger motor shaft. You may guide it using your fingers or long nose pliers. The curved leg goes over the auger shaft to hold it in place.

Auger Motor Install

Auger Motor Replaced
 
You are back in business!

We carry motors for most pellet stoves and can help with any questions you have.
See them here
https://www.eastcoasthearth.com/search?q=Auger+motors

Click here to contact us.

Happy augering!

September 03, 2016

Magnum Baby Countryside Pellet Stove Auger bushing upgrade for longer more trouble free pellet feeding.

Many stoves made a few years back have upgrades or modifications for more trouble free operation. As the years go by, it becomes more apparent what needs to be improved and how it can be improved. In the case of the Magnum Baby Countryside pellet stove, the Delron lower auger bushing can be greatly improved. Each install is different and even the usage is different so the longevity of the parts may vary. However there is one typical stove and normal usage where we installed a new OEM auger bearing set and the lower OEM delron auger bearing lasted only 2.5 years! Recently while cleaning the stove I saw the lip was already melted and sawdust leaking out of it! The good news is with a slight modification a stronger, thicker wall higher temperature nylon bushing can be installed which I have seen last a minimum of ten years!

See leaking Sawdust

Magnum Baby Countryside Pellet Stove Auger bushing upgrade for longer more trouble free pellet feeding.

Magnum Baby Countryside Pellet Stove Auger bushing upgrade for longer more trouble free pellet feeding.

You may order this bearing here only $10.95
http://www.eastcoasthearth.com/products/pelpro-auger-bushing-ks-5010-1030

I have used this type of bushing as an upgrade in other stoves with tremendous success.

Just like the St Croix stoves, if the auger end plate mounting hole for the bushing is step up to a larger hole size with a titanium step drill bit from Harbor Freight, the bearing will fit snug and should really last!

Original OEM bearing in OEM auger end plate for Magnum Baby Countryside.

New bearing on left and old OEM bearing on the right.


Tools to do the Modification

New Bearing installed for Pellet Stove

Trim bearing down so set collar does not rub against bearing when installed

Make sure auger turns freely with set collar and set screw or set bolt installed
Then apply silicone around edges of auger end plate so there are no air leaks

Final Instructions

Increase the OEM end plate hole from approx, 3/4 inch to 7/8 inch and press in the new nylon bearing.

Summary

The inside diameter of the new nylon bearing is the same size as the OEM one and due to the thicker wall and stronger material will provide a much longer life for the auger motor and alot less auger jamming!


April 14, 2015

Greasing the Auger Bearing on 25-PDVC/ 25-PDV


The Englander 25-PDV and 25-PDVC auger bearings do not come greased when purchased brand new. See the dry channel in the pictures below. See Englander 25-PDVC auger and bearings in pictures below.

Simply pump red high temperature grease from a cartridge into the alemite (Zerk) fitting using a grease gun purchased from Lowes or Home Depot.

This should be done atleast every 2-3 years to keep your auger motor from wearing out easily.

Here are some helpful reference pictures:

Bottom Auger with dry bearing. See empty grease channel.
 Grease gun setup
Squeezing in the red grease Filled channel
Greased auger sprayed with Dry Moly (after wire wheel brushing and grinding rough spots) Align Augers and check to see if they turn freely. Zerk fitting on left for easy access.
New high quality auger motors Top auger in hopper

May 25, 2014

Replacing the Auger Bearing to Improve Safety, Maintain Auger Motor & Reduce Auger Jams


Auger bearings hold the pellet stove auger in place. They need not be replaced if they are sticking or jamming. They just needs a thorough cleaning to remove gummy deposits. However, a pile of sawdust in the bottom of your stove indicates the bearing is very worn, or perhaps even missing. I have seen stoves that passed the factory's quality control without a bottom auger bearing present! In either case, the auger shaft undergoes alot of play, wobbling back and forth when turning. When the fines or sawdust fall and pile up, nothing prevents the convection/room blower from gathering them and blowing them through the hot stove. When the sawdust gets hot, burning embers fly out the front of the stove! This can be an extremely hazardous situation. Having your stove professionally cleaned is a must. In the process, such conditions can be identified and fixed, saving both property and lives!


Also, in some instances, worn out bearings turn with the auger. This creates friction like a disc break, which impairs the auger motor.This most commonly occurs with brass bearings. The friction also damages the mounting plate, which should be replaced along with the bearing.

To replace the bearing:
 1. Unplug the stove from the AC and remove side and or back panels.
2. Disconnect the 2 wires connected to the auger motor.
3. Remove the auger collar set screw or hitch pin.
4. Remove the auger motor.
5. Remove the bolts that hold the endplate or backing plate. Cut off any silicone sealant.
6. Pry off the backing plate, removing the silicone sealant or silicone gasket.
7. Remove the auger and check for burrs or splatters of slag from sloppy welding. Grind off burrs, slag, wire brush, and all carbon and corrosion. Protect the auger with "Dry Moly" high temperature industrial lube.
8. Reassemble with the new bearing and a new auger motor, if needed. The high performance Gleason-Avery Auger motor is recommended. Click here to view.
9. Thoroughly clean the room blower and the inside back of the stove to remove all fines and sawdust.
10. Replace side and back panels and plug stove back into AC

Top feeding augers have a top auger bearing as well. Typically, it is the bottom bearing near the auger base that gets worn and requires replacement. Most augers have a back or bottom mounting plate. Kits including the mounting plate and auger bearing, or simply the bearing itself can be found by clicking here. A nylatron endplate and bearing can be used to upgrade the brass bushing for Whitfield as well as Enviro EF2, EF3, and Meridian pellet stoves. This upgrade reduces auger jams and helps the auger motor last longer! A kit containing both the bearing and endplate is required. Click the links below:

Whitfield Nylatron Bearing & Endplate
Enviro Nylatron Bearing & Endplate

April 03, 2014

Tutorial: How to Reverse the Direction of an Auger Motor


Certain stoves need the auger motor to be set up for clockwise rotation (CW) while other need to be set up for counterclockwise rotation (CCW). If you turn the auger by hand without the auger motor, then you can tell which direction to set the motor in order to push pellets into the auger chute then the burn pot. To test whether it is now turning in the correct direction, connect an AC cord directly to the auger. To flip the magnet and change the direction you can follow these 7 steps:

1. Remove the two screws that only hold the magnet to the gearbox.
2. Remove the 2 screws that hold the motor brush and shaft to the back of the motor.
3. Remove the motor brush from the large hole.
4. Flip  the magnet and the wires over. Be careful not to pinch the wires when you're done.
5. Insert the motor brush back into the hole and insert the 2 screws and carefully tighten them down.
6. Insert the 2 screws that hold the magnet down.
7. Connect an AC cord to test proper operation and correct direction.


One sign that an auger motor must be replaced is if it slows down or skips under a load (gears are stripped in the gear box when turning the auger.) It is recommended to check with a local service person to see if this is the issue. We highly recommend Gleason Avery auger motors. They are made with the highest quality ball bearings that make them outlast other motors and they fit many pellet stoves. These motors are the highest quality gearbox motors made by Gleason-Avery with stall torque at 200 in lbs truly the workhorse of the line to help prevent auger jams compared to other common motors that are approx. 155 in lbs. If you are looking for an auger motor, you can contact us (click here) and we can help you find the right auger motor for your stove. We carry Gleason-Avery as well as some OEM motors. You may also visit the links below (we also have some that are not on the website that we can post for you on request). We can flip the auger motor to the correct orientation for your stove on Gleason-Avery Motors.

1 RPM Auger Motor (Englander, Enviro, Hudson River, Travis, Whitfield, Astroflamm, Regency, Pellet Master) - See pages for specific models.

2 RPM Auger Motor (Englander, Mangum, St. Croix Pellet Stoves)

4 RPM Auger Motor (Magnum)

4 RPM Auger Motor (Harman after 2009)

4 RPM Auger Motor (Harman before 2009)


October 05, 2013

Pellet Stove Vacuum Hose & Switch Issues


Recently, I have come across a lot of cases where pellet stoves shut down prematurely after 3 to 6 hours or right after the start cycle when the fire lights up.

Most of these intermittent problems are due to aging parts in the automatic exhaust blower vacuum sensing safety shutdown.

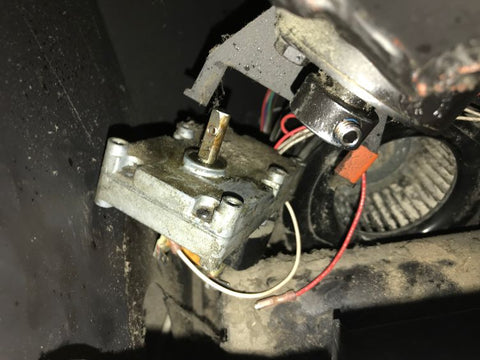
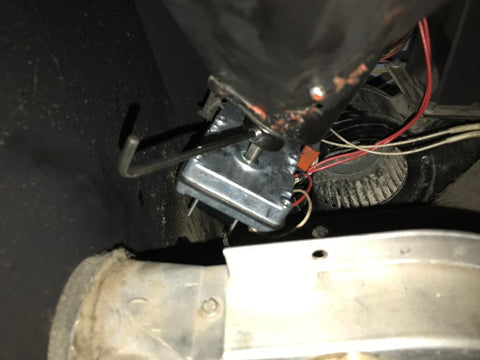
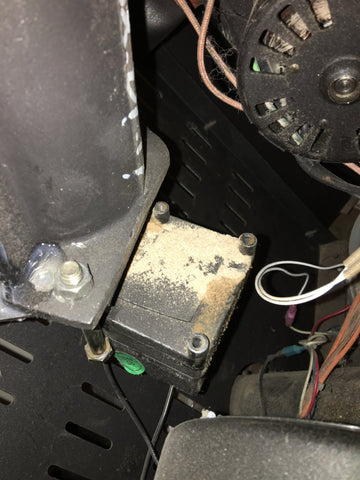
  This safety system employs a hose and a vacuum switch. The vacuum hose is connected from the exhaust plenum to the negative port on the vacuum switch. Most pellet stoves use the negative port because the hose barb on the exhaust plenum is sucking air in and pulling the vacuum switch closed. The positive port is where air blows into the vacuum switch and this positive pressure closes the switch. Therefore, if the exhaust blower shuts down or dies the wires connected to the switch cause an open circuit and stop the auger from turning which in turn shuts the stove down. In the case of Englander stoves with dual augers, the switch is only connected to the top auger which also stops the pellets from feeding and shuts the stove down. Usually, this system indicates a bad combustion (exhaust blower) or venting plugged with ash or a dirty stove.  It also can indicate a bad door gasket or a bad ash pan gasket if there is one on the stove. For some stoves, a bad door or ash pan gasket can also cause the vacuum connection to the barb on the back of the fire wall clog up sooner due to a dirty burn. A vacuum error can occur if an upgraded high speed blower is installed in a Magnum BabyCountryside stove.  To resolve this issue, the damper needs to be adjusted in the air intake on back of the stove. I have also seen the vacuum switch with the hose on the wrong port or the wires not connected to the correct connectors. However, this would cause immediate failure. Always check the above conditions before replacing parts
  
What can go wrong with an older stove and why?

Aging vacuum hoses get stiff, brittle and crack, and some get stretched where they connect to the hose barb. The bladder type membrane in the vacuum switch also gets weak and may develop a small tear or leak.

Pinpointing these failures can be challenging because the above issues may not show up until the stove heats up. The hose and bladder membrane are connected to either metal or plastic. The heat expansion differs for those two materials which causes a leak and the part fails. Therefore, the auger stops feeding pellets and the stove shuts down.

Some stove manufacturers may have changed the formulations of their switches and hoses to save money. I have seen more failures these days due to such cost saving engineering. In earlier stoves, metal vacuum switches with solid contacts switched the 120 vac going to the auger. Newer stove designs use lighter contacts on plastic vacuum switches that go to the digital control panel and only have to carry a small current or voltage.

Testing the vacuum switch

The wires can be pulled off the vacuum switch and connected together. Make sure that the stove power is disconnected and neither of the vacuum switch  connectors touch the chassis or ground. Insert the jumper carefully and plug the power back in.
If you do not feel comfortable doing this, a trained serviceman can do it for you.
Then run the stove to see if it works. If the stove works there is a vacuum detection issue. If the vacuum hose and ports are clean then it is most likely the vacuum switch.
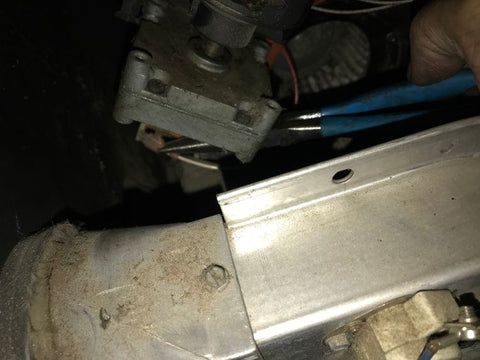
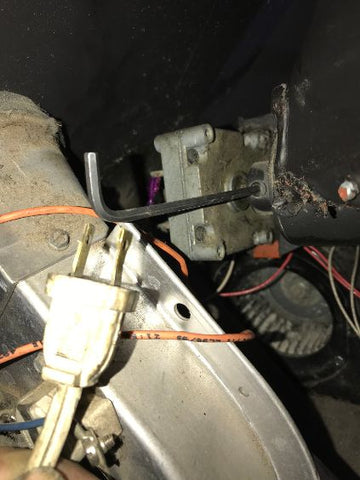
Pic 1 - Shows 18 gauge wire with yellow arrows pointing to 2 male quick disconnect clips that can be purchased at your local hardware store.
Pic 2 - Shows red arrows pointing to vacuum switch terminals where the stove wires were removed. The yellow arrows point to the jumper inserted into the stove connectors for temporary testing.


It is possible if these parts work when the stove is just starting or cooler and test good with a continuity tester or digital mult-meter. These parts can fail when the stove heats up if they are worn or the control panel can be bad and should be replaced. However, a bad control panel will also cause an immediate failure.

What is the best solution to intermittent failure caused by bad vacuum system parts?

At East Coast Hearth, we offer heavy duty metal vacuum switches and high performance, very high temperature natural clear wall silicone vacuum hoses.  These are not OEM parts but premium parts from the company that manufacturs them!

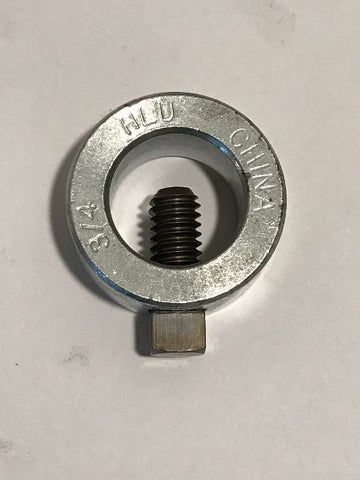
Our heavy duty metal vacuum switch may be ordered here. Also see this page for specifications.

Thick Wall High Temperature Hi Performance Vacuum Hose

We sell clear hoses that you can see through to easily notice if there is any ash clogging the hose that can cause your stove to quit.
Most vacuum hoses are 7/32" or 5.9 mm in diameter. We sell 5.9 mm high temperature silicone hoses that fit tightly even with no clamps.

  Our clearer hose is stronger, better quality and easier to see soot clogging.
This quality hose has a heavier wall and handles very high temperature and does not crack, or yellow easily.

To understand your problem and the length of hose you need:
Here are examples of vacuum hoses and their lengths with the error status you may see.

Englander 25-PDVC (When there is a bad vacuum switch and/or bad hose, the control panel may or my not show an E1 error)
Original frosty color thick wall vacuum hose is 12.5 inch length from exhaust plenum to vacuum switch 1
Original frosty color thick wall vacuum hose is 9 inch length from fire wall to vacuum switch 2

Enviro Empress (When there is a bad vacuum switch and/or bad hose, the control panel heat level 2 light blinks as stove shuts down)
Original thin wall burnt orange color vacuum hose is 12.5 inch length from exhaust plenum to vacuum switch

Breckwell p-4000 (When there is a bad vacuum switch and/or bad hose, the control panel heat level 2 light blinks as stove shuts down)
Original medium wall red color vacuum hose is 12.5 inch length from back of fire box to vacuum switch

Magnum Baby CountrySide (When there is a bad vacuum switch and/or bad hose, the control panel heat level 2 light blinks as stove shuts down)
Original thin wall red color vacuum hose is 6.5 inch length from back of fire box to vacuum switch

Magnum Baby CountrySide Insert(When there is a bad vacuum switch and/or bad hose, the control panel heat level 2 light blinks as stove shuts down)
Original thin wall clear color vacuum hose is 20 inch length from back of fire box to vacuum switch


1st Pic - Shows new clearer high temperature hose
2nd Pic - Shows Englander vacuum hose that has yellowed and cracked causing the stove to go out after 3 hours
3rd pic - Shows red vacuum hose from a Breckwell P4000 where the ends have stretched out and an orange vacuum hose from a Magnum BabyCountryside that is stiff from age and causes the stove to die out from time to time.

Click on pic to enlarge:


Wood pellet stove vacuum switch history:


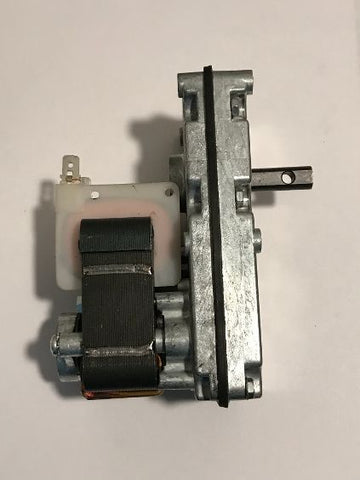
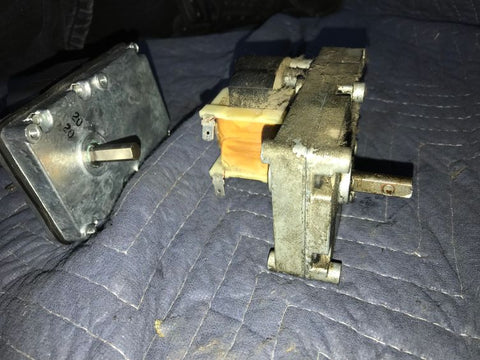
The early pellet stoves employed heavy metal vacuum switches with side mounted switches. See picture of an early 1990's Avalon Avanti Vacuum switch and vacuum hose below. These metal vacuum switches were in series with the auger motor and had to carry the same current. New stoves today have plastic switches wired to a digital control panel that only carry a small current. The higher auger motor current is switched by a triac on these electronic control panels. At East Coast Hearth we still sell the heavy metal vacuum switches because they still last longer and work better. Unfortunately the vacuum hose employed in pellet stoves still vary greatly today. They range from the more rubbery and flexible silicone to a harder plastic formulation. The harder plastic can withstand higher temps but are very stiff and not always tight fitting. Some of the more flexible silicone like the one in the picture below is tight fitting but thin wall and can yellow and crack easier. See pic below. At East Coast Hearth we sell only the High Performance Thick wall high temperature flexible silicone hose for not only a tight fit but longer lasting too.

Pic 1 - Shows Englander plastic vacuum switch, Enviro hybrid metal & plastic vacuum switch made by Honeywell and Magnum plastic vacuum switch

Pic 2 - Shows older heavier metal vacuum switch - These metal switches last many years.

Pic 3 - Yellow arrow shows constriction in hose where it was routed under a hold down clamp in back of stove. (Thin wall hose pinches, yellows and cracks) 


October 05, 2013

Trouble Free Pellet Feeding Performance - Pimp Up Your Auger!


If your pellets are not dropping and the auger is binding or just a bit squeaky, then you need a complete auger servicing.
The photos below were taken of the top auger in an Englander 25-PDVC but the procedure can be applied to any brand stove's auger.

Here are the steps we take to pimp up our customer's auger for less resistance and longer auger motor life while trying to avoid the dreaded auger binding and jams!
If you would like this service please fill out the service form by clicking on the link below.
Click here to contact us for your auger service

In my experience, even a new less expensive brush type auger motor will work well after this treatment but if you want the best and longest life from your motor, then go with the high quality ball bearing Gleason-Avery. Auger motors get weak due to aging windings where the laminations breakdown and cause shorts in the wires, worn gears can slip and skip in the gearbox and auger bearings wear so the motor shaft does not turn freely after years of use, so a new auger motor is highly recommended as the total cure for pellets not dropping. Multi-testers using the ohms scale only measure any resistance from one auger motor terminal to the other. Since we are checking continuity here measuring the resistance of the auger motor windings will show little difference between a brand new motor and a very old one. If any part of the coil wire is broken or open the muti-tester will read infinity but the shaft will not turn in that case. Even if the weak auger runs at start up, it may stop running when the stove heats up or with shorts in the windings the magnetic field may be much weaker  causing it to have less torque and quit under load. That is a more likely sign the auger motor needs replacemnt.
Click here to order your new auger motor

1. Remove all black carbon with a wire wheel.
2. Ground down burrs and jagged edges with an arrow shaped grinding stone.  This works well on cast iron augers.
Note: The grinding stone is used sparingly on stainless steel augers due to scratching.

3. Smooth out auger with Emory cloth from your local hardware store
4. Clean up auger with a rag and Acetone from your local hardware store
5. Mask up bottom gasket with masking tape and spray down auger with Dry Moly Spray.

Dry moly spray is not usually sold at the local auto or hardware stores
The dry moly spray can be ordered from us as part of the lube kit by clicking the link below.
Click here to Order your Dry Moly Spray and Motor Lube

6. Smooth, clean and spray the auger tubes and grease the bearings!
7. Re-Assemble auger in chute.
8. Turn auger by hand to assure proper alignment and smooth operation.
9. Attach auger motor.
10. Test auger motor with AC test cord if available.

See the final finished picture of the serviced auger that is clean, smooth with no burrs! The auger is slick to the touch for easy turning!

Note: Damp or wet wood pellets or wood pellets loaded with fines (sawdust) will still jam up augers. Always screen fines or buy good quality wood pellets!


auger jam auger stuck auger not turning auger sticky auger binding top auger motor pellet stove auger motor RPM auger motor auger motor replacement breckwell auger motor avalon auger motor lopi auger motor englander auger motor saranac auger motor harman auger motor napoleon auger motor quadrafire auger motor